Microgreens are a relatively new product that has already gained its audience.
They are actively used by restaurant chefs to decorate dishes, added to the diet by people who follow a healthy lifestyle, and simply grown by those who miss fresh aromatic greens during the winter.
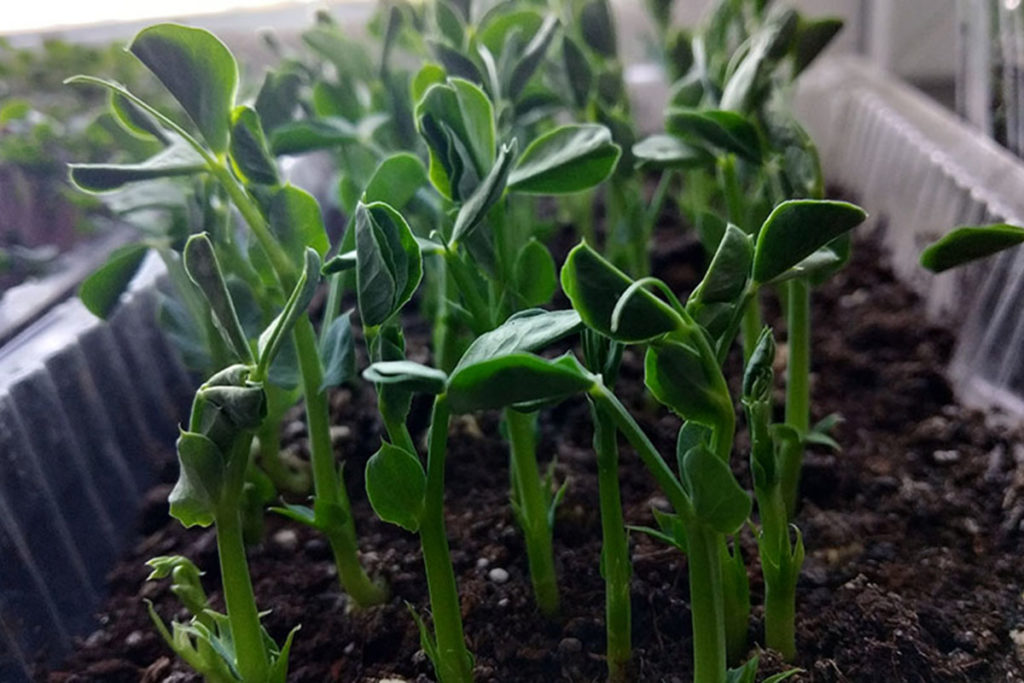
Growing microgreens at home does not require significant expenses;
the main thing is to use organically clean seeds, appropriate containers, and a substrate. There is no need to spend money on fertilizers or pesticides due to the short growing period.
In this article, we will explain how to grow vitamin-rich sprouts with minimal costs.
Which Seeds to Choose
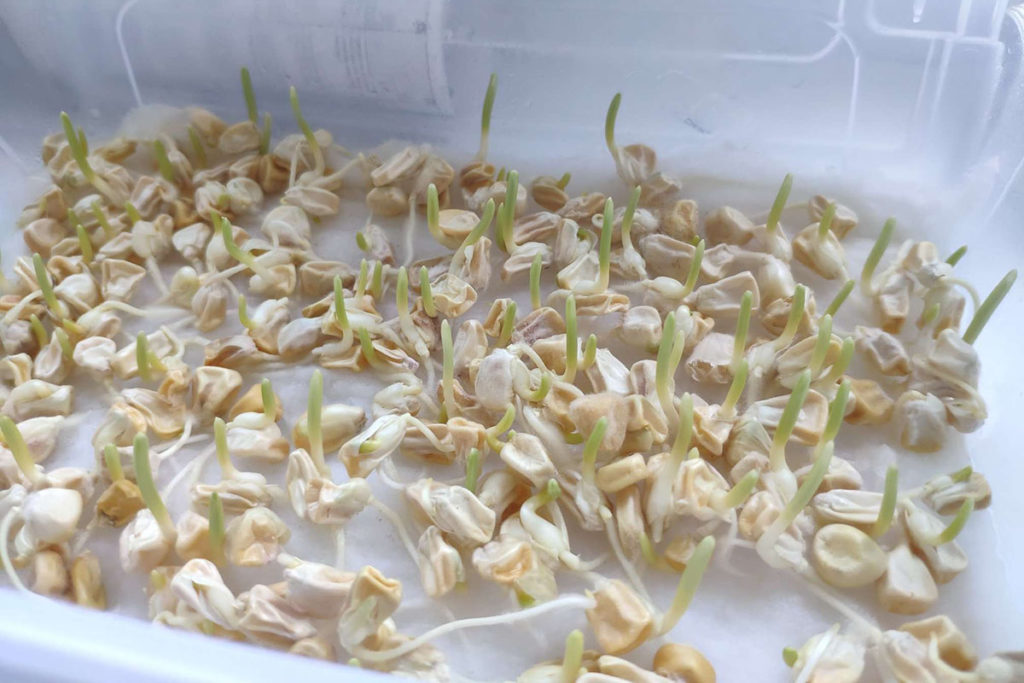
First of all, you need to choose the seeds. Which crops are suitable for growing microgreens? All of them! All grains, legumes, and vegetable plants are suitable. The only crops not suitable for growing vitamin-rich sprouts are those from the Nightshade and Cucurbit families, as well as beans (their sprouts contain toxic substances).
Microgreen seeds must be organically clean and not treated with chemical pesticides. Ideally, you should sow seeds harvested from your own garden. Otherwise, untreated seeds in stores are usually cheaper than treated ones.As for crop selection, we recommend reading the article
“Microgreens: Which Crops to Grow, Their Benefits and Harm.”
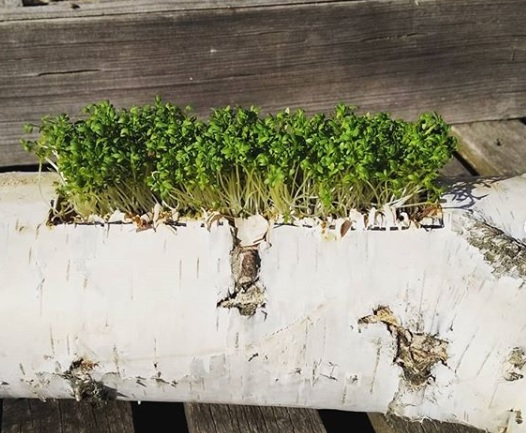
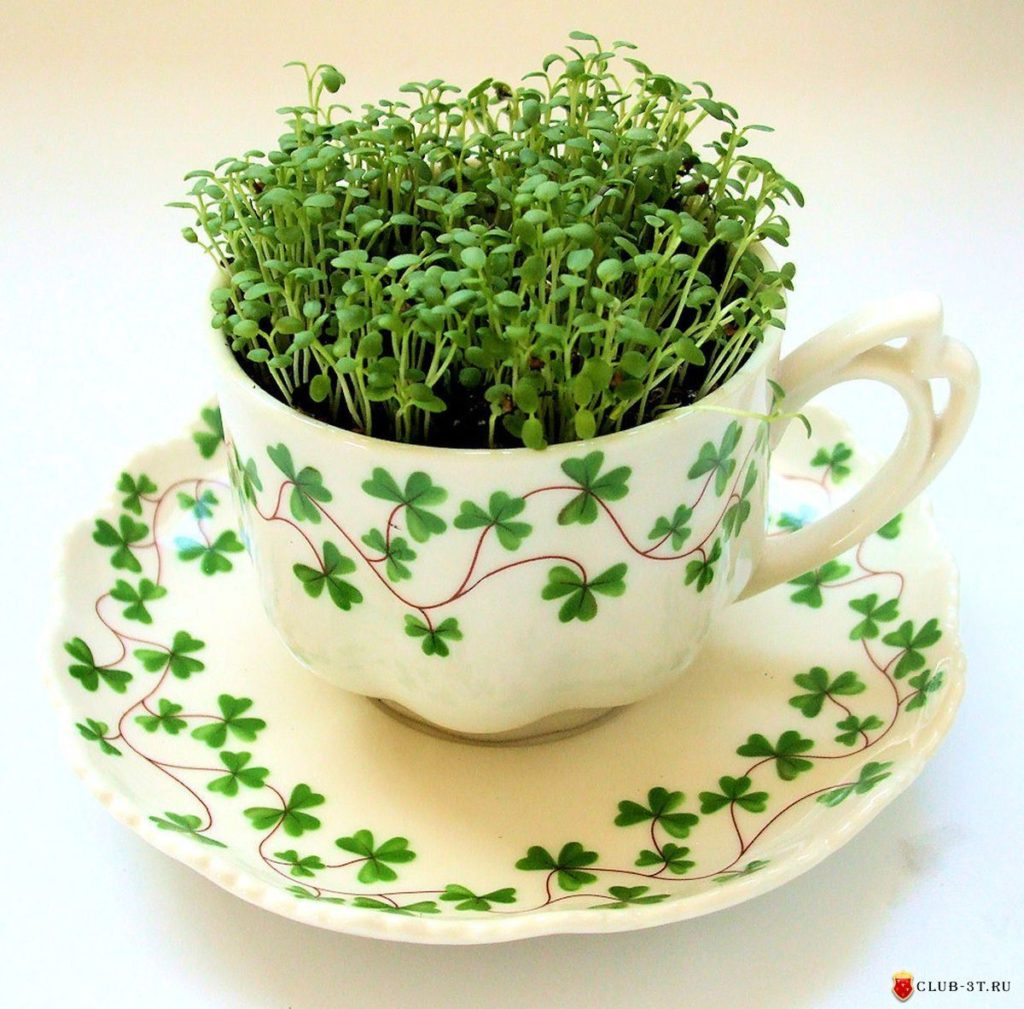
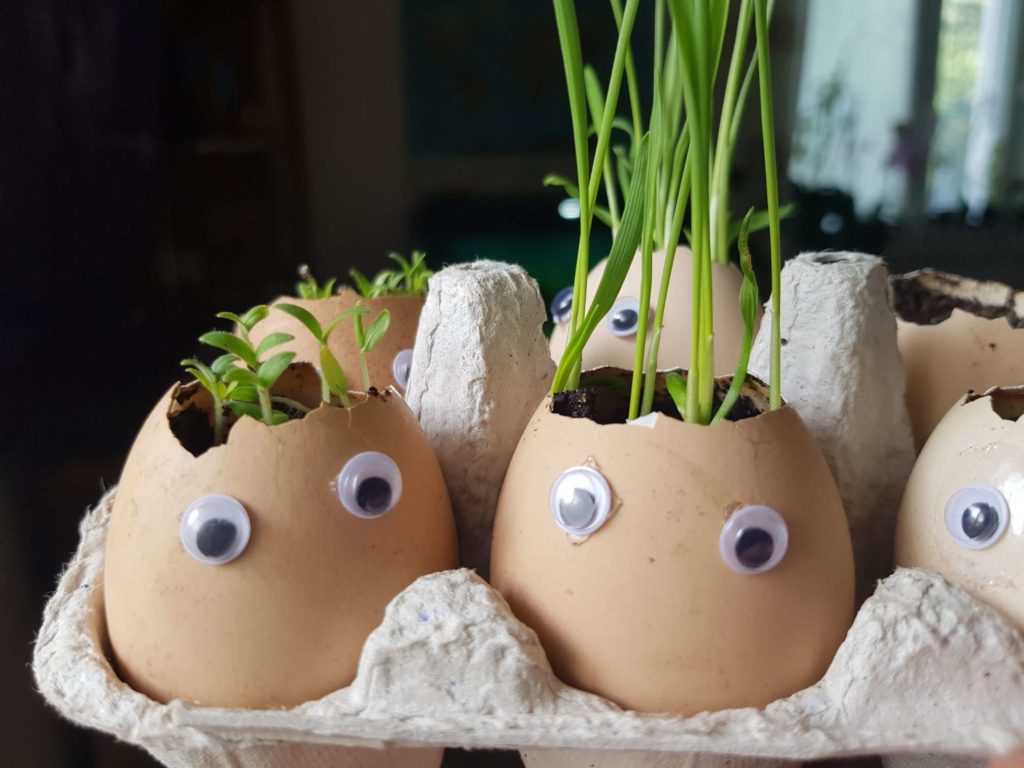
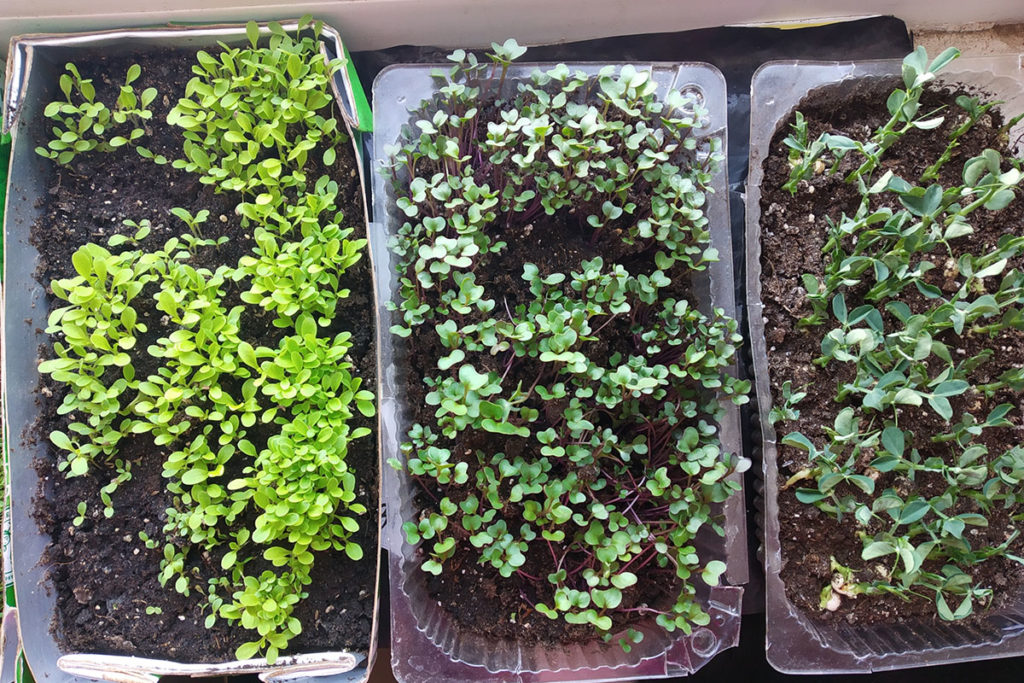
How to Save on Containers
Microgreens don’t require drainage in the planting containers, so almost any container you have at home will work for growing them. Food containers, cake boxes, flower pots, egg trays, old plastic packages (such as a cotton swab container or sushi box) — all are suitable.
In summer, an old log filled with cute green sprouts can become a charming decoration for your yard.
And microgreens sown in eggshells, a cup, or any small dish can brighten up your kitchen. First of all — it’s beautiful, and secondly — it’s fresh sprouts right on your table.
Growing Microgreens in a Jar Without Soil
This method is especially convenient for sprouting large-seeded crops. You can find special jars for this purpose in stores — with lids, trays, and stands. But few people know that a regular 0.5 or 1-liter glass jar will work just as well.
Fill the jar with warm water and soak the seeds inside. Then cover the jar with a mesh lid or gauze, securing it with a rubber band or thick thread. After 8–12 hours, drain the water and place the jar at an angle of about 30 degrees so the remaining water can drain out.
Care after that consists of rinsing the seeds 2–3 times per day. Throughout the sprouting period, the jar should remain tilted to allow excess moisture to escape. The gauze over the jar opening keeps the seeds from falling out.

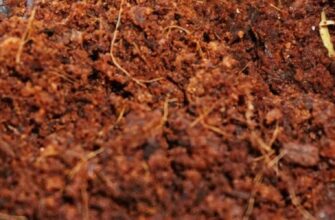
Low-Cost Substrate Options for Growing Microgreens at Home
You can grow microgreens using almost any substrate. Professionals sow seeds on flax mats, coconut substrate, light peat, perlite, or vermiculite. These materials are relatively inexpensive,
but you can also make a seed base using improvised materials you always have at home.
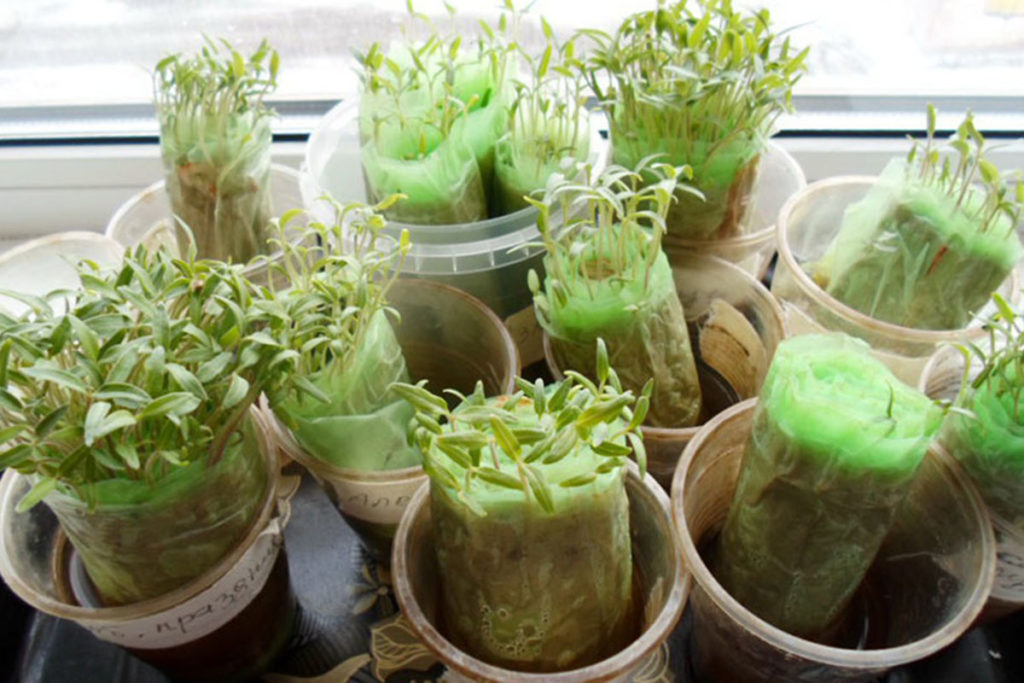
Paper Towels and Toilet Paper
These items are always on hand and can be used for growing microgreens once using the following methods.
Option 1. Take a small tray, lay out paper towels in several layers, and moisten them generously using a spray bottle. Spread the seeds evenly on top, cover with a lid, and place the tray on a windowsill. After that, care for the seedlings as usual.
Option 2. Cut strips of toilet paper and plastic of the same size. Place the paper on top of the plastic and gently moisten it using a hand sprayer. Leaving a small margin from the edge, arrange the seeds in a row. Carefully roll the paper into a scroll and place it into a jar or glass. Pour in a little water. Cover the container with transparent film, a plastic bag, or a cup. Once the seeds begin to sprout, remove the cover. After that, make sure there’s always a little water at the bottom of the glass.
Cotton Wool and Cotton Pads
This is an inexpensive material that can be found in every home. Cotton wool and pads are easy to shape to the desired thickness, they are sterile and retain water well. For convenience, the cotton wool can also be wrapped in medical gauze or bandage.
Spread cotton wool or cotton pads on the bottom of a container, moisten them well, and sow the pre-soaked seeds. Cover the container with a lid or plastic wrap. Then regularly ventilate and water the seeds until they sprout. After that, remove the cover and spray the sprouts with water 1–2 times a day, preventing the substrate from drying out.
Gauze, Bandage, and Non-woven Medical Wipes
These can be found in every home medicine cabinet and are sold in pharmacies for next to nothing. Fold the material into several layers, and you will get an excellent “substrate” for growing mini plants. The sowing and care for microgreens here is no different from the standard growing technique.
DIY Sprouter
Nowadays, the internet offers many special sprouters for growing microgreens at home without soil. Of course, these devices are very convenient and can be used an unlimited number of times, but the green vitamins grown in them will end up being very expensive. We will describe two ways to make DIY microgreen sprouters.
1. Homemade Sprouter from Inexpensive Materials
What you will need:
- two plastic food containers with lids, about 15 cm high. Their sizes should differ by 1–2 cm so that one container easily fits into the other;
- a black marker;
- an electric screwdriver with a 2 mm drill bit.
How to make a DIY sprouter:
- Mark the future hole spots on the bottom of the smaller container using the marker.
- Drill through holes using the screwdriver. There should be many holes — the container should turn into a colander.
- Place the smaller container with holes inside the larger one and cover with a lid. The sprouter is ready!
Growing microgreens in a homemade sprouter:
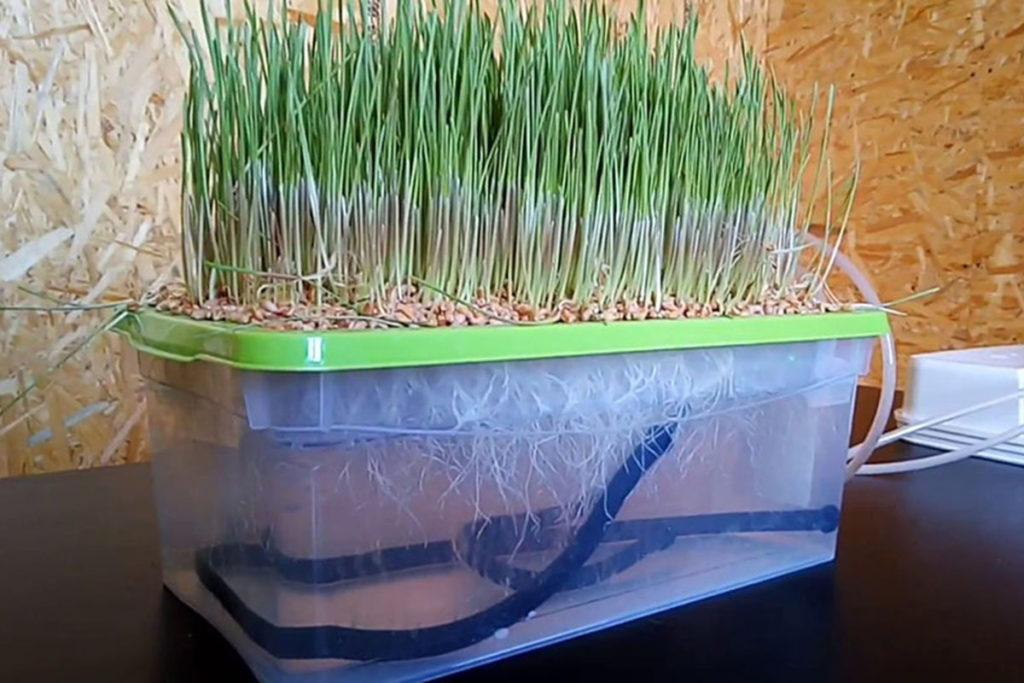
To grow microgreens in this sprouter, pour water into the bottom container to the level of the perforated tray. Spread out the seeds and cover with the lid. With this method, the seeds do not require pre-sprouting. Further care is the same as with other growing methods — just make sure there is always water in the container. If your tap water is hard, it’s advisable to let it sit for 24 hours before use.
2. Sprouter — Ideal for Sprouting Grains and Legumes
What you will need:
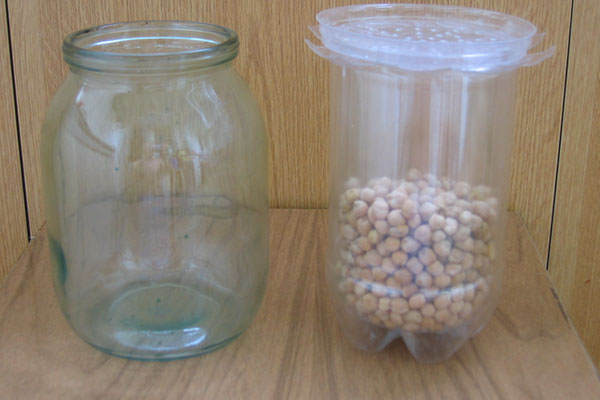
- 2 plastic bottles of different diameters. For example, you can use a 1-liter bottle with a flat bottom (such as from sunflower oil) and a 1.5-liter bottle from mineral water;
- a plastic lid about 9 cm in diameter (e.g., from a store-bought cheese container);
- a knife;
- pliers;
- large scissors;
- an awl.
How to Make a Sprouter
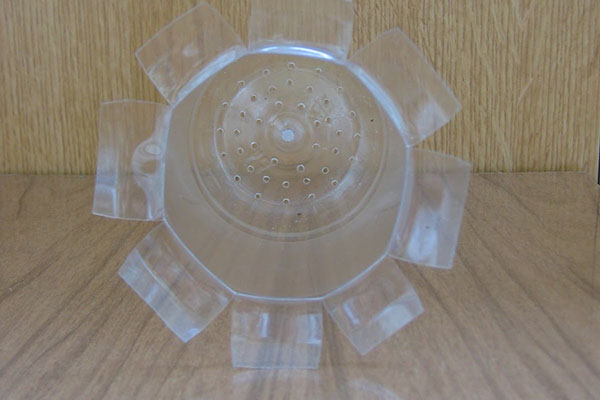
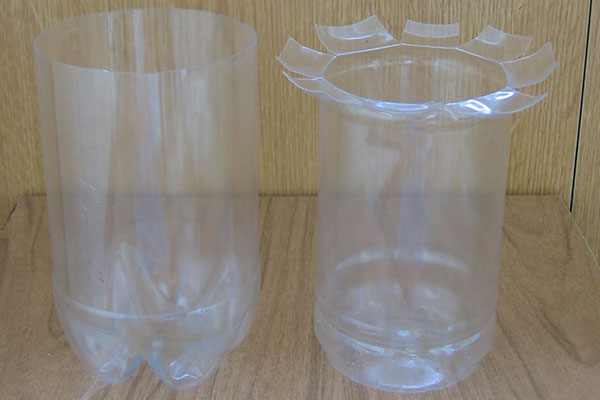
- Cut both bottles at a height of 15 cm using a knife. Use scissors to even out the edges so they are the same height. The larger bottle will be the outer container, and the smaller one — the inner container.
- Make 8 cuts, each 2 cm long, along the top edge of the inner bottle.
- Bend the resulting “petals” outward using pliers. These will hold the inner container inside the outer one, creating a space about 2 cm high.
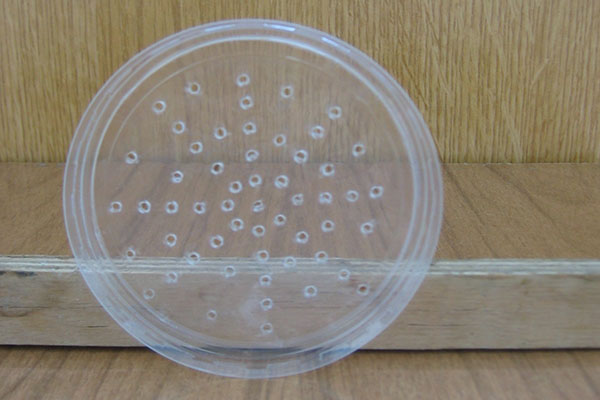
- Then, use an awl to make through-holes in the bottom of the inner container. These are necessary so that water drains into the bottom of the outer bottle during rinsing.
- Use the awl to make holes in the plastic lid as well.
How to Use the Sprouter:
Pour the seeds into the inner container, filling it halfway. Insert the inner container into the outer one and pour water over the seeds to rinse them well. Remove the inner container and drain the water from the outer one.
Then pour in fresh water again and leave the seeds to soak for 8–12 hours. After that, drain the water, rinse the seeds once more, and pour out the excess moisture from the tray. You can then cover the seeds with the lid with holes.
From then on, rinse the seeds 1–2 times a day, removing the excess moisture from the homemade sprouter.
In conclusion, we can confidently say that there are many ways to save your budget when growing microgreens at home. The vitamin-rich sprouts grown using these methods are no different from those obtained in a commercial sprouter. So, you can enjoy healthy plants all year round without significant expenses!
Share photos in the comments of what containers you use to grow microgreens at home, what substrates you prefer, and which crops you like the most!
If you have found a spelling error, please, notify us by selecting that text and pressing Ctrl+Enter.


Мне все равно,стоят,чи коштуют,лишбы дешевле